

For those new to ClickUp or considering whether it’s the right project management tool, understanding its structural hierarchy is fundamental. ClickUp is designed as an all-in-one work management solution, offering tools for task tracking, dashboards, whiteboards, calendars, and even built-in communication features. Given its vast capabilities, configuring ClickUp properly from the beginning is crucial to prevent workflow complications in the future.
In this guide, we will explore the ClickUp hierarchy, its influence on project and task management, and strategies for setting it up optimally for teams of diverse sizes.
Breaking Down ClickUp’s Hierarchy
The hierarchy within ClickUp serves as the foundation for organisation.
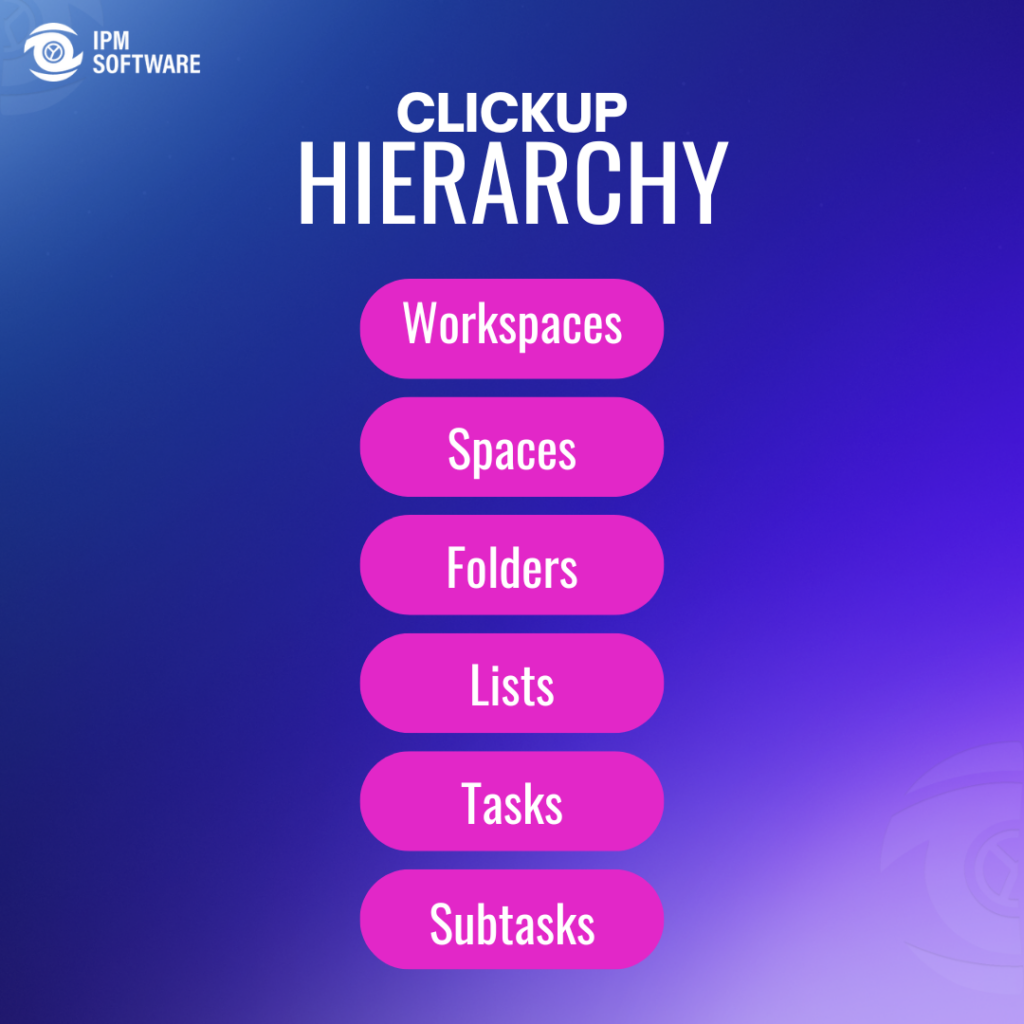
It consists of:
- Workspace – This is the overarching environment representing your organisation or business. Think of it as a virtual office where all projects and tasks reside.
- Spaces – These act as designated sections for different departments or teams, such as Marketing, Sales, or Operations, allowing for better work segregation within a single workspace.
- Folders – Housed within spaces, folders help categorise projects or related workstreams. For instance, a marketing space may include folders for Social Media, Ad Campaigns, and Content Strategy.
- Lists – Contained within folders, lists organise tasks under specific projects or objectives, enabling easy tracking and management.
- Tasks – These are the fundamental units of work. Each task can be assigned to individuals, given deadlines, and updated with statuses to track progress.
- Subtasks – Used to break down tasks into smaller, actionable components. For instance, within a task titled “Develop Content Strategy for Client X,” subtasks might include “Conduct Keyword Research,” “Outline Blog Topics,” and “Draft Social Media Calendar.”
How to Set Up ClickUp for Your Team
Step 1: Creating and Managing Your Workspace
Your workspace is where all your projects live. If you’re running a business, you may only need one workspace. However, some users prefer separate workspaces for personal and business tasks. To create a new workspace:
- Access workspace settings.
- Select “Create a New Workspace”.
- Provide a name and adjust settings accordingly.
Step 2: Structuring Spaces for Team Efficiency
Spaces serve to divide work areas logically. For example, a marketing agency might have spaces for:
- Content Marketing
- SEO Campaigns
- Paid Advertising
To create a space:
- Click “Add Space”.
- Assign a name and customise the icon.
- Configure permissions and accessibility.
- Define workflow templates or set up status structures.
Step 3: Organising Projects with Folders and Lists
Folders refine organisation further by categorising similar campaigns within a space. If handling various marketing initiatives within the Content Marketing space, one might create:
- Folder: Blog Strategies
- Folder: Social Media Content
- Folder: Video Marketing
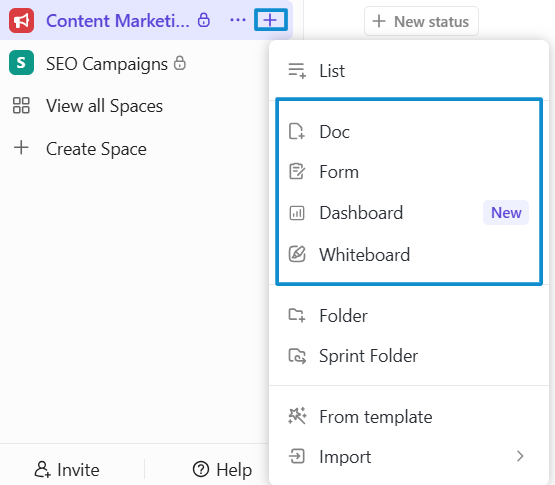
To create a folder:
- Hover over the space where you want to add the folder.
- Click the plus (+) icon next to the space name.
- Select Folder from the dropdown menu.
- Enter a folder name, configure its settings, and click Create Folder to finalise.
Each folder would contain project-specific lists:
- List: Instagram Content Calendar
- List: Facebook Ad Copy
- List: LinkedIn Thought Leadership Posts
To create a list:
- Navigate to the folder where you want to create the list.
- Click the arrow next to the folder name.
- Select List from the dropdown options.
- Name the list, customise its settings, and click Create List to add it to your workflow.
This method ensures clarity and streamlines navigation.
Step 4: Creating and Managing Tasks
Tasks live within lists and represent the work that needs to be done. ClickUp allows you to:
- Assign tasks to team members.
- Set deadlines and priorities.
- Create checklists for step-by-step guidance.
- Add comments and attachments for collaboration.
To create a task:
- Open a list and select “New Task.”
- Name the task and add details like due dates and assignees.
- Break complex tasks into subtasks for better tracking.
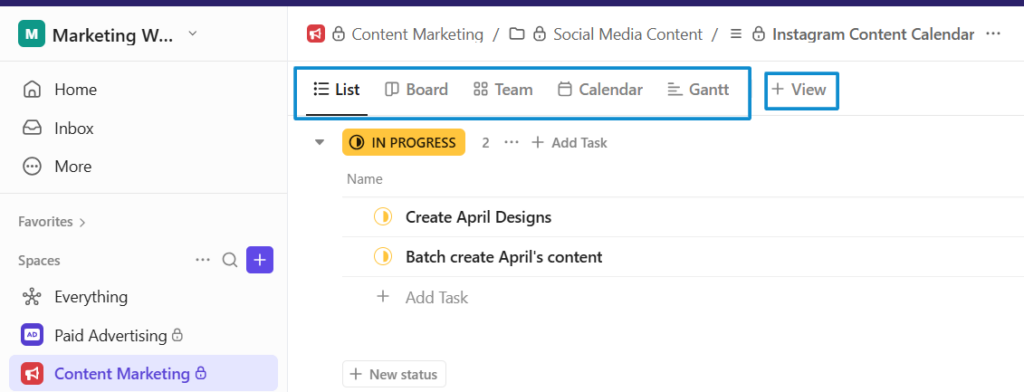
Step 5: Customising Views and Columns
ClickUp provides different task views to suit various workflows, including:
- List View – A standard to-do list format.
- Board View – A Kanban-style layout for workflow visualisation.
- Calendar View – A date-driven perspective for scheduling deadlines.
- Gantt Chart – A timeline view for project tracking.
Additionally, users can customise task columns to include:
- Due Dates
- Time Estimates
- Status Updates
- Priority Levels
Step 6: Managing Statuses and Automations
Custom statuses help streamline workflow management. You can:
- Set up project-specific statuses like “To Do,” “In Progress,” and “Approval Required.”
- Use automation rules to update statuses based on task progress.
- Save custom status templates for future projects.
Step 7: Enhancing Productivity with ClickUp Features
ClickUp offers additional tools to improve efficiency, such as:
- Docs – Internal documentation for process guidelines.
- Forms – Customisable forms for collecting project requests.
- Whiteboards – Visual collaboration tools for brainstorming.
- Dashboards – Real-time reporting and project insights.
Common Mistakes When Setting Up ClickUp
Mistake #1: Overbuilding
Overcomplicating ClickUp with too many spaces, folders, and lists can create confusion. A solopreneur or small team doesn’t need multiple layers of structure. Keep it simple and scalable.
Mistake #2: Consistency Overload
Not all processes are equal. Some tasks deserve their own space, while others should remain as simple subtasks. Treating all processes the same can make your ClickUp setup rigid and inefficient.
Mistake #3: Underbuilding
On the other hand, not creating enough structure can lead to chaos. If permissions are frequently adjusted on individual tasks, consider using folders or lists to manage access more effectively.
Mistake #4: Relying Too Much on Hierarchy
If you’re spending more time navigating ClickUp rather than completing tasks, something is wrong. Utilise dashboards, notifications, and filtered views to streamline your workflow instead of digging through layers of hierarchy.
Benefits of Setting Up ClickUp the Right Way
Setting up ClickUp correctly allows for improved efficiency, clearer workflows, and better team collaboration. A well-structured workspace eliminates confusion, streamlines project tracking, and enhances productivity by reducing time wasted on organisation and navigation. By utilising automation and customised views, teams can focus more on execution rather than managing tools.
Difficulties in Setting Up ClickUp
Despite its benefits, setting up ClickUp can present challenges. New users often struggle with deciding how to structure workspaces, spaces, and folders effectively. Striking the right balance between too much and too little organisation can be tricky. Additionally, adapting ClickUp’s vast features to fit unique business processes, managing user permissions, and optimising automation for repetitive tasks require time and effort.
Turn Your ClickUp Setup into a Productivity Powerhouse
Setting up ClickUp the right way is just the beginning. A well-structured workspace can transform the way your organisations operate, leading to increased efficiency, better collaboration, and more successful campaigns. But why struggle with trial and error when you can have an expert guide you through the process?
At IPM Software, we specialise in helping marketing agencies like yours optimise ClickUp for maximum productivity. Whether you need a custom setup, automation, or training for your team, we are here to ensure ClickUp works for you; not the other way around.
📞 Book a free consultation today and let us streamline your workflow, eliminate inefficiencies, and take your project management to the next level!
Schedule Your Free Consultation Now